Painting the Servant's Quarters - Part II

If you've been watching Downton Abbey, you have a pretty good idea of what a maid's bedroom looks like. Above is a shot of a maid's quarter recreated at Trail End in Wyoming, a beautiful mansion, now a museum. Although the DV is very far from being like Downtown Abbey and Trail End, I think that the maid's quarters would have been very similar. To know more about the servants' duties go to this historical site on Weddington Castle here.

One of my pet peeves: people who do not remove the hardware before they paint a room or a house. And it's probably the worst pet peeve to have when you own a century old house.

Before

After

If painting a room was actually just painting a room, I would be finished by now. But for the owner of an old home, all that prep work before the actual painting is like a track and field obstacle course. I also prefer painting my doors flat, so I'm also one of the reasons why it takes longer. Thank goodness I don't have to deal with structural problems.

The following shots will show you how the maid(s) quarters were and still are separate from the rest of the house with its own door, hallway and staircase leading down to the kitchen.

Up the main staircase, on the landing of the second level there's a door.

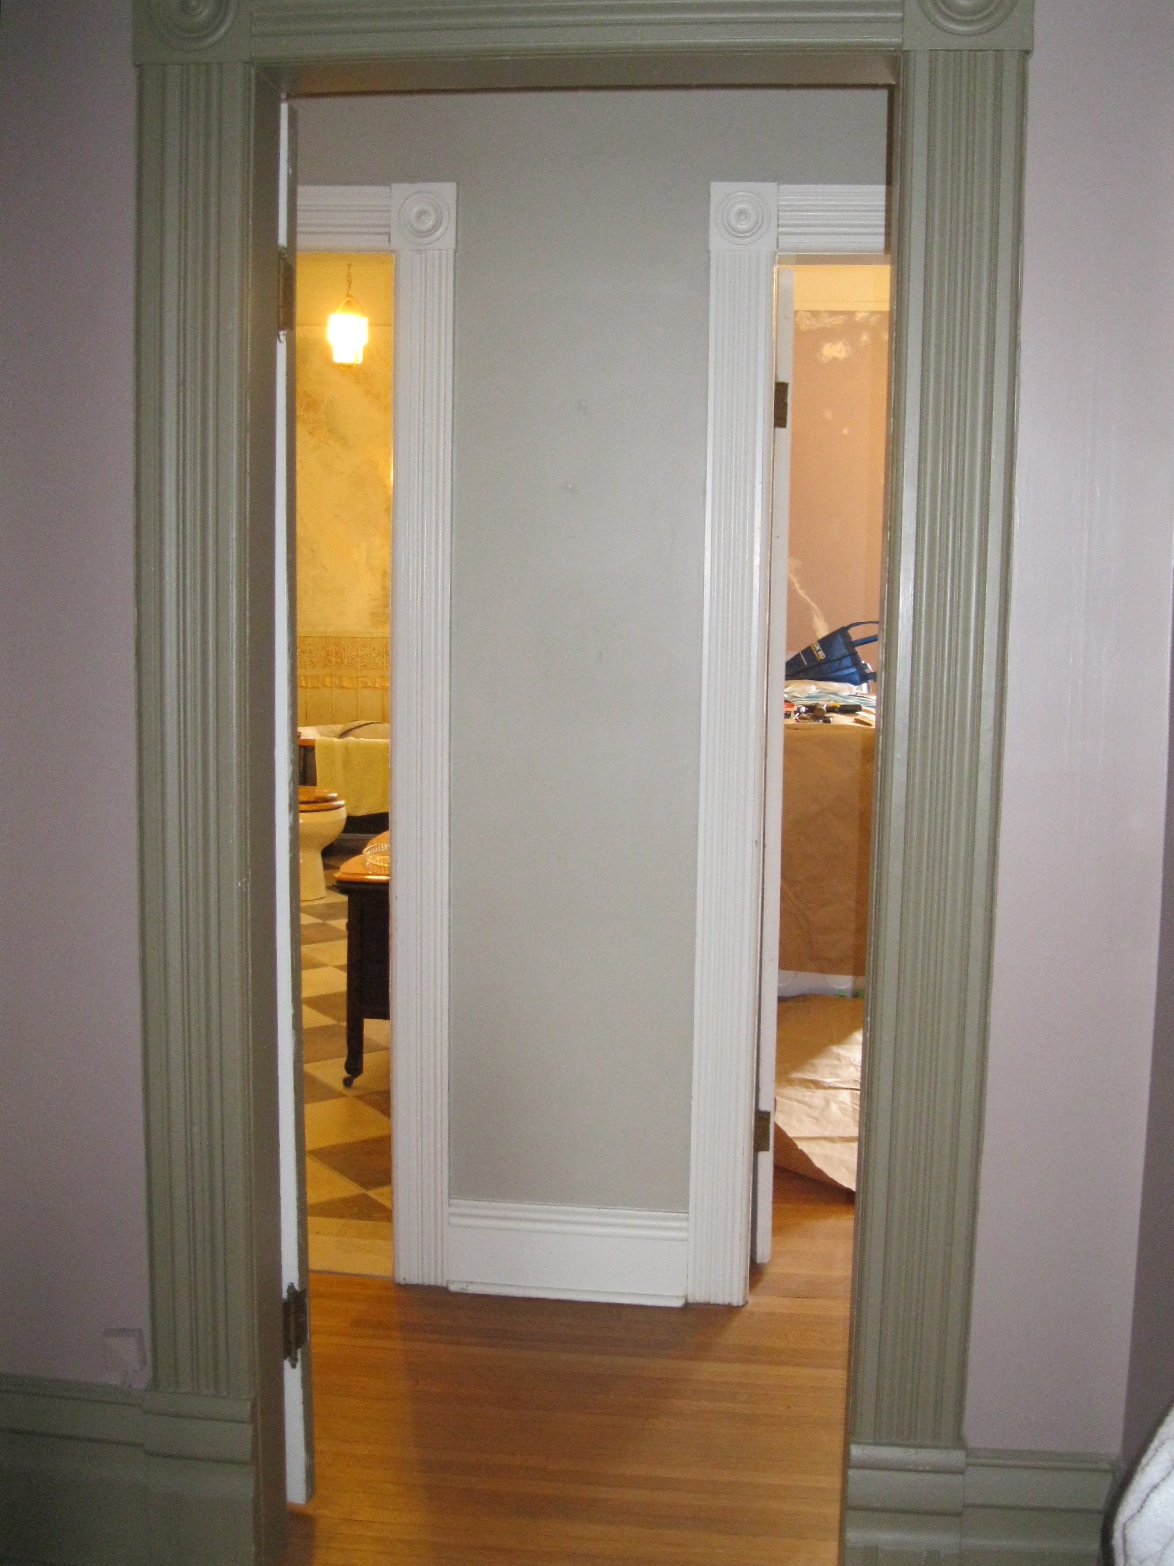
This door leeds to a small hallway and two other rooms. On the left the bathroom, on the right the laundry room.

Work in progress in the laundry room.

The small hallway leads to a staircase...

..which leeds down to the kitchen. When we first moved to the DV, we were not used to the narrowness and steepness of these stairs and we all, at one point or another, took a tumble, dogs included.

When the two doors are closed, they really help in cutting down on the kitchen noises, convenient for when we have guests and we have to get up early to prepare breakfast.

Painting the Servant's Quarter - Part I

I've started stripping and cleaning the hardware for my shutters, but I'll spare you the unsightly details and show you what I've been up to while they were soaking.

(If you're really interested, you can see past efforts here.)

My laundry room is located at the back of the house on the upper level. It used to be part of the servants quarters... come to think of it, it still is. It also serves as doggie wash & groom room and it's where we keep most of the cleaning products. Renovated by the previous owner many years ago, it is due for a freshening up.

This area would have been the sleeping quarters of the maid(s). Before running water, the laundry would have most probably been done in a part of the kitchen, close to the water pump.

The image on the left is an ad from the 1911 magazine Brian found before Christmas. More old washing machines can be seen here.

This is my laundry room.

It's a bright room and very pleasant to be in. It certainly beats going down to the dungeon to do my laundry. The armoire and chest, once Astrid's baby furniture, are now ideal for storage.

I'm not big on knotty pine, but the cupboards have good storage capacity. The laundry tubs are very convenient, especially when washing the dogs, but they're very old and one of the tubs cracked from Chaz's weight (and he's not a big dog). It's only a matter of time before the other one goes. Luckily, laundry tubs are on sale at my local hardware store.

The closet is used for storing tools, summer screens, winter windows, vacuum and steamer. Anything to avoid going down into my horrible basement.

The closet revealed old wall paper - decor taste of a distant past.

The suspended lights are very handsome - unexpected choice for a laundry room, but I'm not complaining. Also showing is the wallpaper border - decor taste from a not so distant past.

The trims are badly dinged up.

Original mouldings without a doubt.

The wall paper boarder is in the process of being stripped.

Here, I proceeded with caution, but nothing serious. One never knows with an old house.

Here is where Brian has to step in. I can't reach the area above the cupboards.
I'm thinking of painting them, but will wait until the walls have their new colour to make that decision.

Patched up holes, dents, cracks etc...

Another ad found in the century old magazine was for this cleaning product - a brand still sold today and found in my cupboard. Except for minor changes, they kept the same character logo. In the original ad, the little lady looks like she's very determined to clobber someone with that wooden laundry stick. I kind of sympathise for some reason. In the contemporary one, the determination is still there, but the stick was replaced by a toilet brush or a magic wand and a rainbow was added. That little lady's determination to tackle the job at hand is perhaps the key to her longevity.


Layers of History: The Dusty Victorian's Past in Paint


This April will mark the fourth anniversary of our ownership of the Dusty Victorian. Restoring while maintaining the character of the house has been very interesting and rewarding; Brian and I appreciate history.

Scraping away at several paint layers gives us a glimpse at the colours chosen by previous owners. We don't have photographic records of the DV from the beginning. The first owners were the builders of the house and lived here for a very short period of time. Having worked on the front doors, shutters and window frame, I know that these were originally not painted, but varnished over natural wood.

The second owners eventually painted over the varnish using a combination of colours: buttery yellow, creamy white, dark hunter green and pale green. They may not have been used all at the same time, but it seems to have been the palette used for much of their ownership (which lasted well into the 'fifties).

The earliest colours found were along these lines.

This is the earliest photograph of the DV we have - circa 1940. The side panels on each side of the entrance door are actually storm doors that could be closed, similar to shutters for windows. You can see those storm doors and these original front doors here, recycled in my guest bedroom. They were found on the ground by the side of the house, where they'd been resting for decades.

It was so lush around the DV at that time. A lot of it is long gone, but I'm working on restoring that lushness.

The burned red and cream combination were the choice of the third owners.

This was the DV with the palette chosen by the previous owners. This photo was taken in the spring of 2008, just after we moved in. We can't really see the colours from this shot; they didn't translate well from a distance.


Here are the actual sample colours from the previous owners.

Here is the DV taken at the end of last summer. It's far from being finished, but little by little it's getting there. When I chose my colours, I first thought of pale colours to avoid premature peeling. Historical colours in respect to the house, fresh looking so it's not perceived as haunted by the kids in the neighbourhood.


The sage green was taken from one of the first colours found - this while stripping a door. I love reds so I chose a garnet red for small areas (also it's my birth stone), and black in very small accents where metal is present, such as windows and shutter hardware, light fixtures, address plaque.


When choosing a white trim, I went for a tinted one as opposed to pure white. Any colours will appear paler outside and washed out in the sun so I chose a white with a green/yellow tint to complement the brick. This said, I prefer a low contrast look that unifies the house. Only time will tell if it weathers well and ages gracefully.

Below are some of the beautiful houses around St Marys with their own colour combinations.


Above is he main entrance to the town's Presbyterian church. There's something about a red door. Very effective here with limestone and black ironwork.

Having more colours on one's house doesn't necessarily bring a more interesting effect, but it always brings more work. In some cases, the multitude of colours do not show from the street, but it's when you start walking closer towards the entrance door that they are gradually revealed - and that is when it becomes impressive. This said, the majority of people seem to be afraid of colours for their house; they play it safe, going for the basic white, beige, grey or brown for all their trims, regardless of the colour of the brick. The only colour I find utterly unappealing for a house is a kind of peachy flesh tone found in abundance in the suburbs of Vancouver.

Now, I'm not an expert in architecture, but I understand balance and proportion. This home looks like it was designed by a cartoon character, yes the character not the cartoonist. I don't think this house will withstand the test of time, but that's a whole different blog.

My 2012 To Do List


At this time of the year, I feel like the guy in this painting. I have three dogs, but it feels like I have a dozen. I don't think I gained weight during the holidays, but I feel heavy and I have no energy. It must be the winter blaws.


Even my house looks drab, fat and tired. It's the north side taken from the school's property. The shutters were removed last autumn. Without the shutters the windows look too narrow in proportion to the house. To think that most people end up permanently removing their shutters, rendering their home bland and generic.

First item on the To Do List, restoring the shutters and painting the window frames on the north side. Five windows in all, so this should count as five items on the To Do List.


Included in the first five items is the removing, stripping and spray painting of the corresponding hardware. Some are already soaking in Safe Strip solution. Ashley from First Home Dreams, uses an old crock pot and lets the hardware simmer in water for a while. I take much comfort in knowing that after this side is done there will be only one window left to restore: the top window of the tower. This one will have to be dealt with by a professional.

Sixth item: Restoring and painting the kitchen doors. The exterior one is very damaged, but nothing I can't handle. I intend to use my front entrance doors as inspiration for the back doors.

The interior door is in much better shape.

The handle is pretty, but the mechanism is so worn down. I'm not sure if I can salvage it for this door, but may install it on the door going to the basement. Anyway, I'll see later.

Seventh item: This is the door to the library. Yes, it's an awful aluminium door - it has to go. It should be replaced by a wooden one, perhaps a custom copy of the kitchen door.

Again, the interior door will be a breeze.

How about that gorgeous door plaque!

Of course there will be much more things I plan to add to my To Do List, but the ones relating to the house must have priority.