A few of my veranda pillars were showing signs of rot. Some at the crown, some at the base and one at both crown and base. Instead of dropping everything and tending to them, I decided to proceed with painting and come back to them later. It's finicky work, but ideal for 'in between drying time' when one paints a veranda with three colours.
Here are the affected pieces, note that I cut off the rotting ends.
One can see the many sections involved in creating the substantial pillar crown. I did not want to remove what was still good, so extra care was taken to achieve a seamless look between the old and the new pieces.
An essential tool in creating perfect angle cut is my trusty miter saw with laser guide. I have a love/scare relationship with it, which is good - it makes me very careful.
Note that I still use my dressmaker's measuring tape - force of habit.
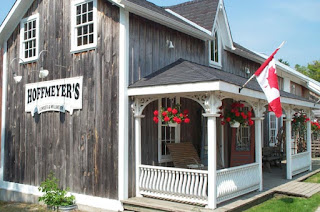
I called on Hoffmeyer's Mill to help me in this restoration work. Only the bottom molding could be ordered from a catalog, the two top ones had to be custom milled.
All the pieces were separately primed, nailed into place and primed again.
Voila, painted and restored.
Since we bought The Dusty Victorian, I found myself purchasing countless items form our local and not so local hardware stores and lumber yards. Growing up in a family of five girls, I found myself being my dad's helper in pretty much everything that had to do with house and yard work. I already knew a lot going in to this 'old house venture' and in the last seven years, I've learned even more due to the antique nature of our home. I've never been shy to ask questions or to seek advice, but every so often, I experience sexism, patronizing comments or get that 'certain stare'.
Not at Hoffmeyer's. Reg was kind, courteous and professional. He took the time to explain and give visual examples even though he runs a busy place. I handed over my old moldings and I got prefect reproductions. I highly recommend Hoffmeyer's.
Thank you to Reg Ogilvie and his team.
Thank you to Reg Ogilvie and his team.
The bases of the pillars get a lot of beating from our Canadian seasons. It's easy enough to remove a damaged molding, but in this case, the corner casing of the pillar was soft as well. There was not enough damage to dismantle everything. I used some wood hardener and wood epoxy to rebuild the corners and patch anything that seemed weak. Scott Sidler from The Craftsman Blog had blogged about this repair technique and I decided to give it a try. Follow the instructions on the label to the letter and you'll be very pleased with the results.
Below are shots of the work in progress, but I forgot to take one where I applied the hardening liquid with a clean brush.
Below are shots of the work in progress, but I forgot to take one where I applied the hardening liquid with a clean brush.
The first piece of molding was cut...
then the new crown molding, always checking that my cuts were tight.
I primed each piece individually, then the pillar itself.
Nailed in the moldings, sunk the nails, filled the nail holes and prime again, then painted.
The two bases of the entrance pillars are restored. I still have another one to do at the other end of the veranda.
Here is a shot of the original post and stair railings from a photograph of the house taken circa 1940s.
And here are the original posts that were in the basement. I will do something with them one day, perhaps little side tables.
Thank goodness for building codes.
It must have been quite the challenge to come down these stairs with nothing much to hold on to, in a long dress and in winter. The posts are about 15" tall and balustrade is about 12" in height. Note below, tongue & groove boards.
It's a long way down if you miss a step. One day, I'll tell you about my missed step and the cartwheel I ended up doing.


